Autodesk VRED: Post-Processing Volumes with Metadata
Christopher Gebhardt • 07.05.2023- Visualization
- Software Development
- Research
- Immersive Exp.
Autodesk VRED's 2023.3 release introduced Metadata services, allowing users to import and use metadata in VRED scenes. In this blog post we explore how to use metadata to implement a post-processing volume that controls camera parameters in real-time demonstrations.
Intro
With their 2023.3 release Autodesk VRED introduced Metadata services to import and use metadata in VRED scenes. They enable you to view and edit Metadata imported from other formats like CATIA, IGES, SolidEdge and many more. They can also be used to control your scene based on metadata present in the scenegraph. A comprehensive tutorial on how to use the Metadata Editor in VRED can be found here.
Before the introduction of Metadata it was also possible to save text based information in scenegraph nodes but this approach was more complex and not very well known: Field Access. Every node in the scenegraph includes a key-value based field that can be used to store arbitray text data. In our Python scripting tutorials for VRED we show a way to store key-value pairs of data in a node and retrieve them. The tutorial can be found here:
Field Access with vrFieldAccess
Metadata Service kind of provides the same functionality but of course way more advanced, accessible and flexible.
In this article I want to show you how you can use metadata to implement a feature that is known especially from game engines like Unreal Engine or Unity: Post-Processing volumes. To be more precise a post-processing volume that controls camera parameters like exposure, field-of-view and color-grading. This can be helpful in real-time demonstrations where a spectator can move between outdoor and indoor scenes. These transitions from high brightness to low brightness levels are handled mostly automatically in game engines nowadays but VRED does not have an in-build mechanism for this. We want to implement post-processing volumes that can be used to control any setting of a scene based on the location of a spectator.
Post-Processing Volume
Post-processing volumes are a feature in game engines and other 3D software that allow users to apply a range of post-processing effects to a specific area in the 3D scene. These volumes can be placed in the game world and are used to apply visual effects such as color grading, bloom, motion blur and other effects to a specific area.
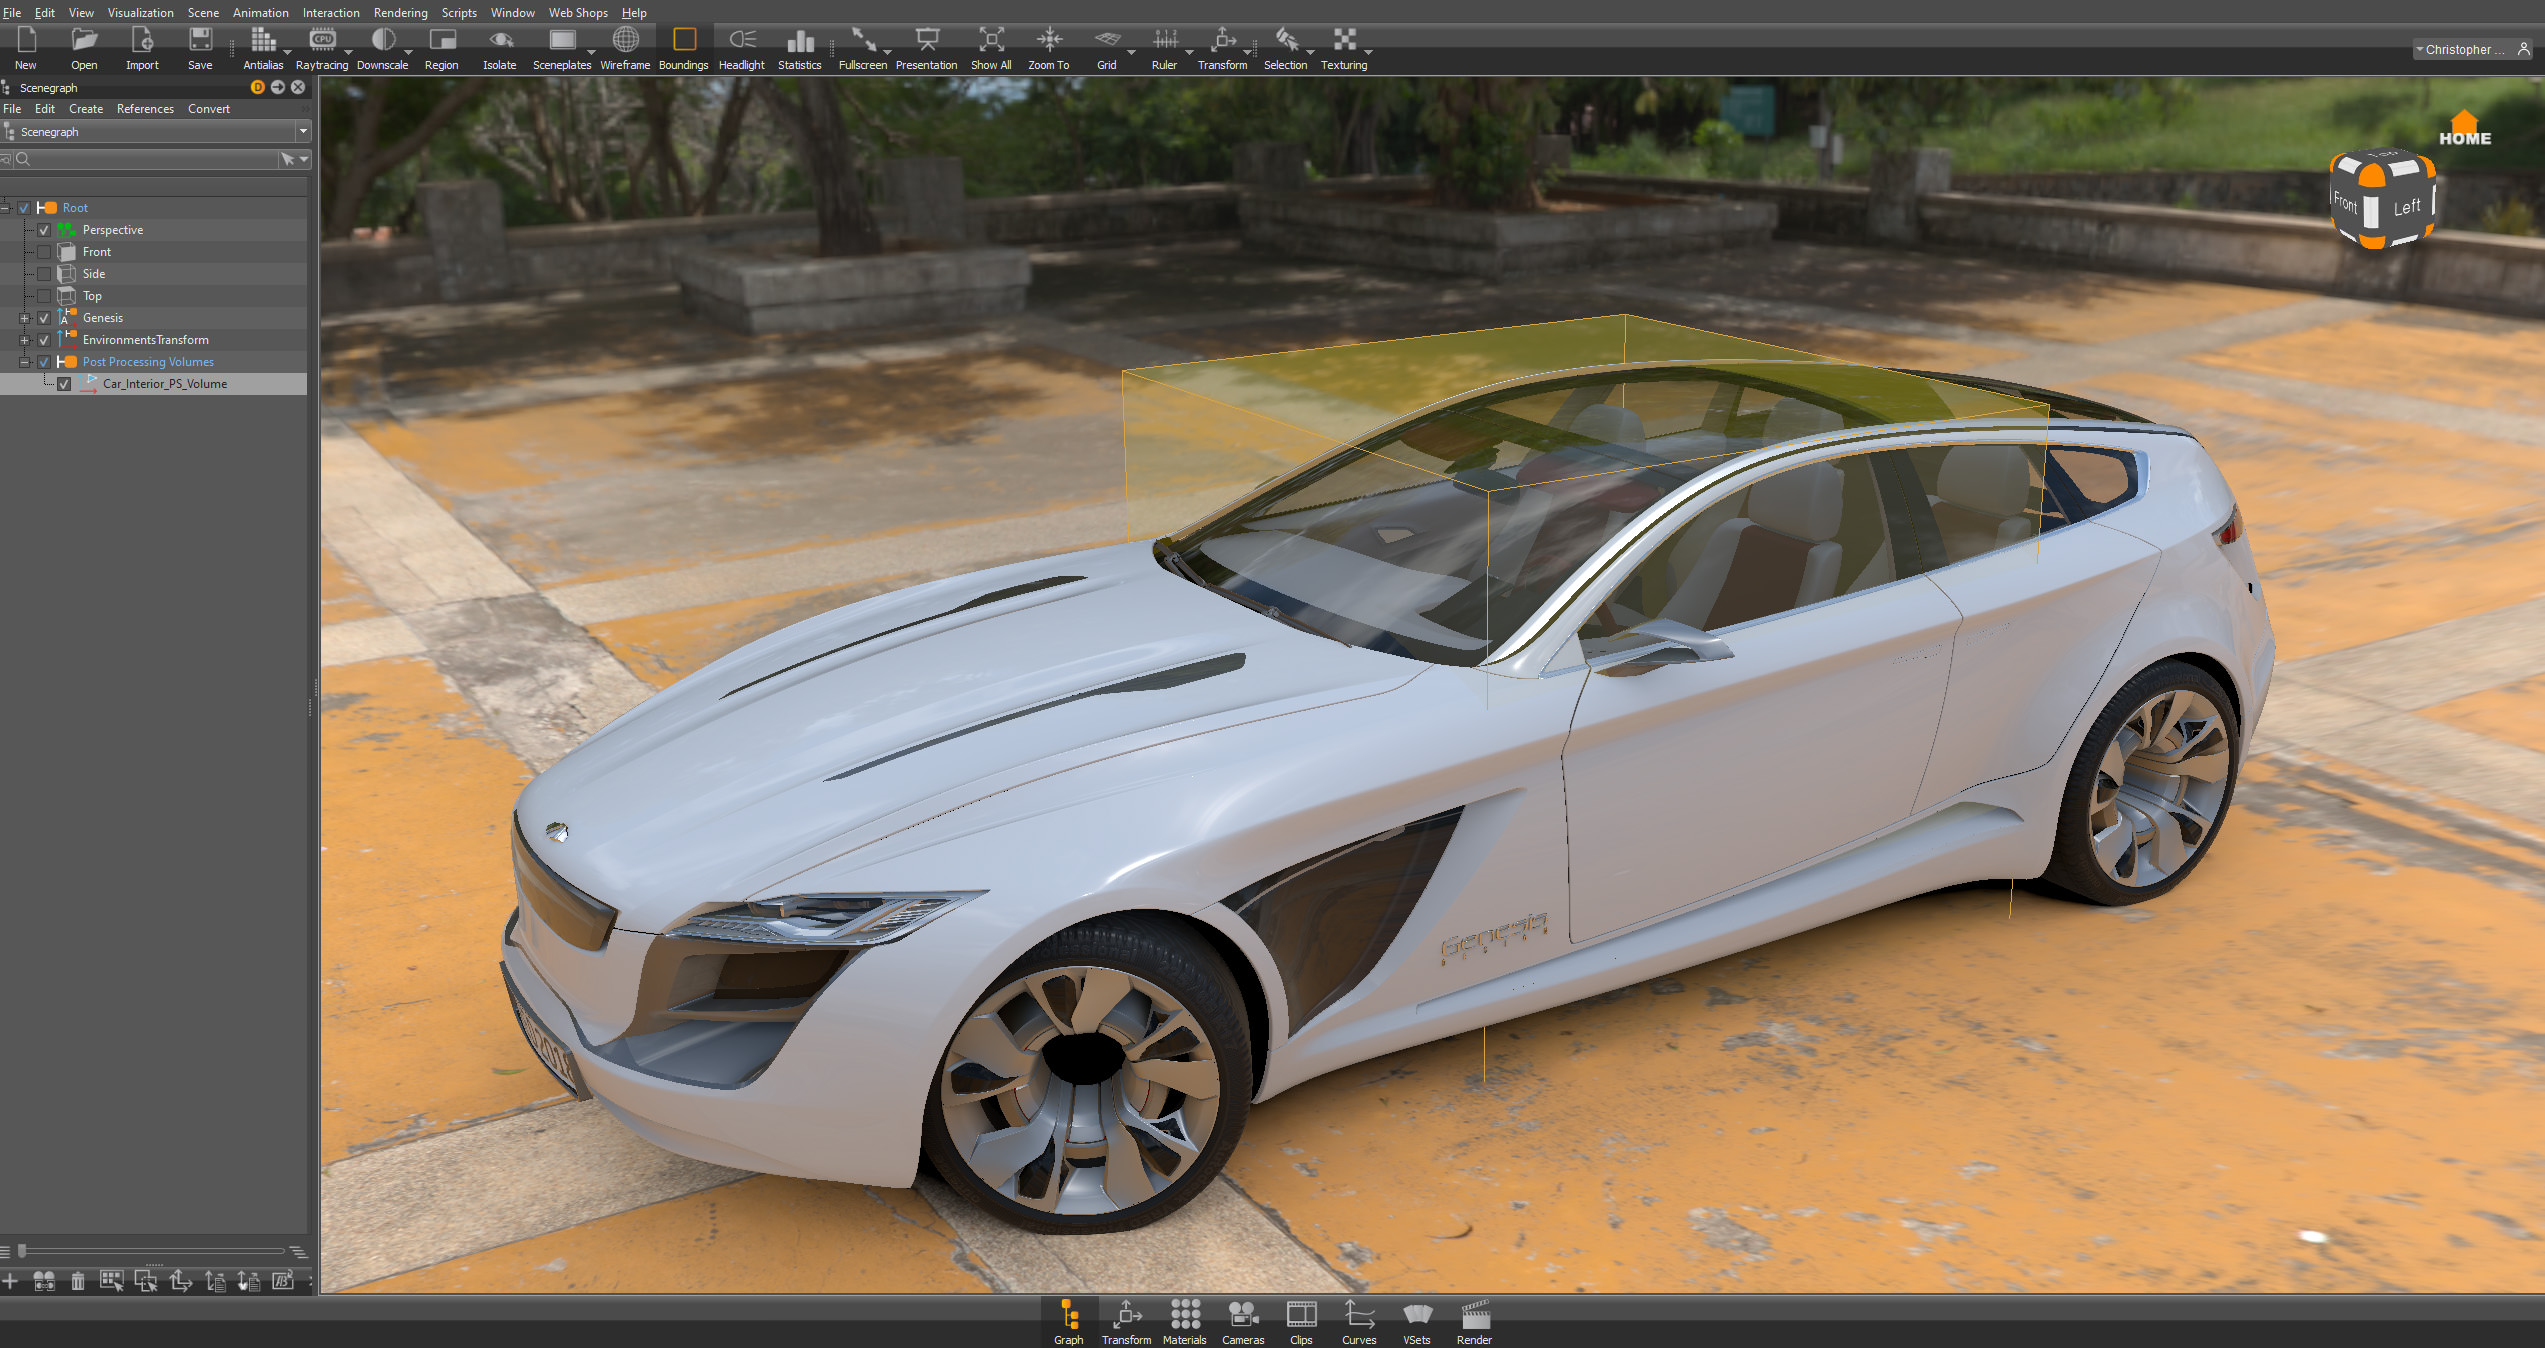
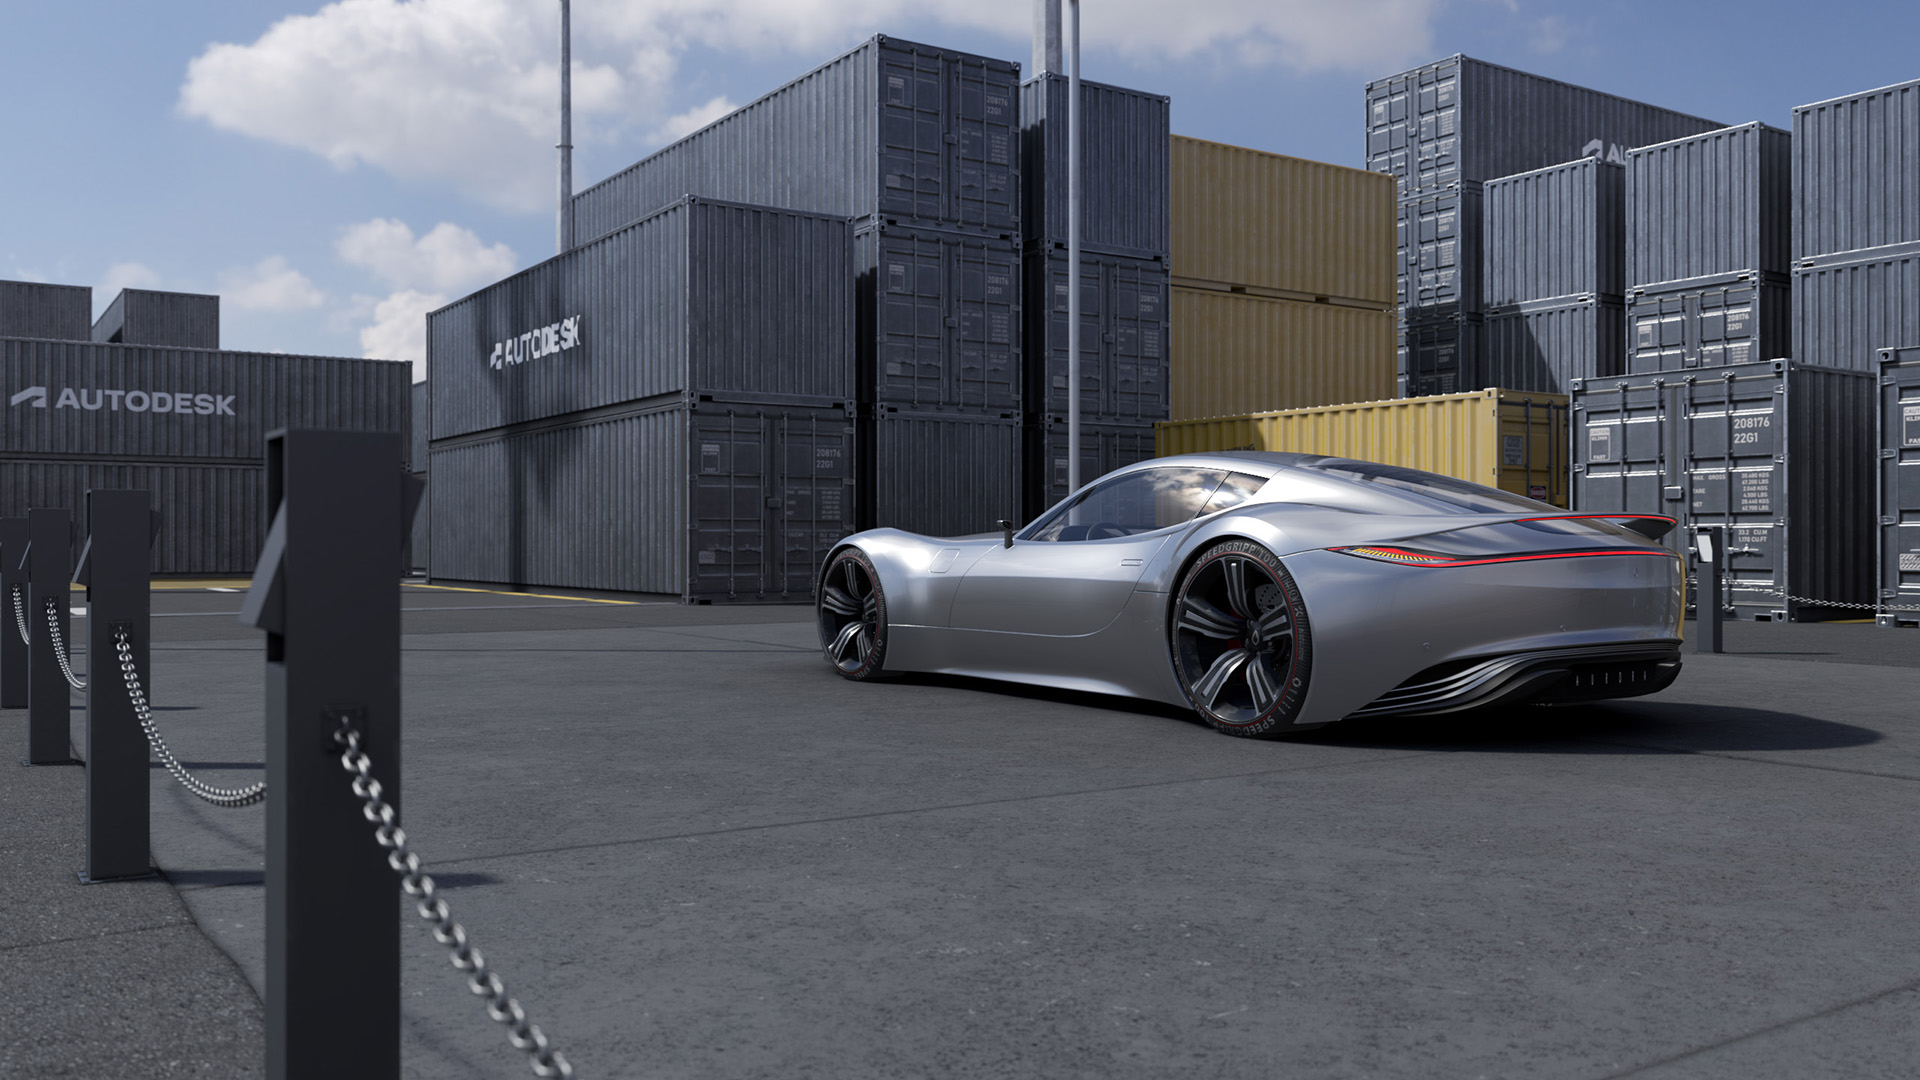
In our case we want to define a post-processing volume that controls camera parameters like exposure and color-grading on the interior of a car. Whenever a spectator is inside this space, a python script will apply all settings that this post-processing volume defines and increase the exposure. That way the camera image will more closely match the brightness level a passenger would perceive when sitting in a car. When we adjust the camera to the brightness level of the outside of the car in a sunny environment the inside of the car would appear to dark to a viewer.
A processing volume in VRED can be defined by adding a box geometry that encloses the cars interior and apply a transparent material. This way the post-processing volume does not interfere with our scene and we can calculate the bounding box and decide if the spectator is inside or outside of this bounding box.
Metadata with Camera Parameters
We will use Metadata to store the camera parameters that our post-processing volume controls. In this case we create Metadata sets that contain different camera settings suited for the environment a viewer is in - in this case a cars interior. We can create a new set in the Metadata Editor and add the following key:
camera:exposure: 3.0
camera:saturation: 0.0
We call this Metadata Set “PostProcessing_CarInterior” and apply it to our bounding box. This way we can query this information with a python script that will tell us that:
The camera should get the exposure 3.0 when its inside the post-processing volume
The camera should get a lower saturation of 0.0 (just for fun)
To identify our volume in the scene we will use a Metadata-Tag on the post-processing volume. This provides an easy way to query all post-processing volumes:
postProcessingVolumes = vrMetadataService.getObjectsWithTag("postProcessingVolume")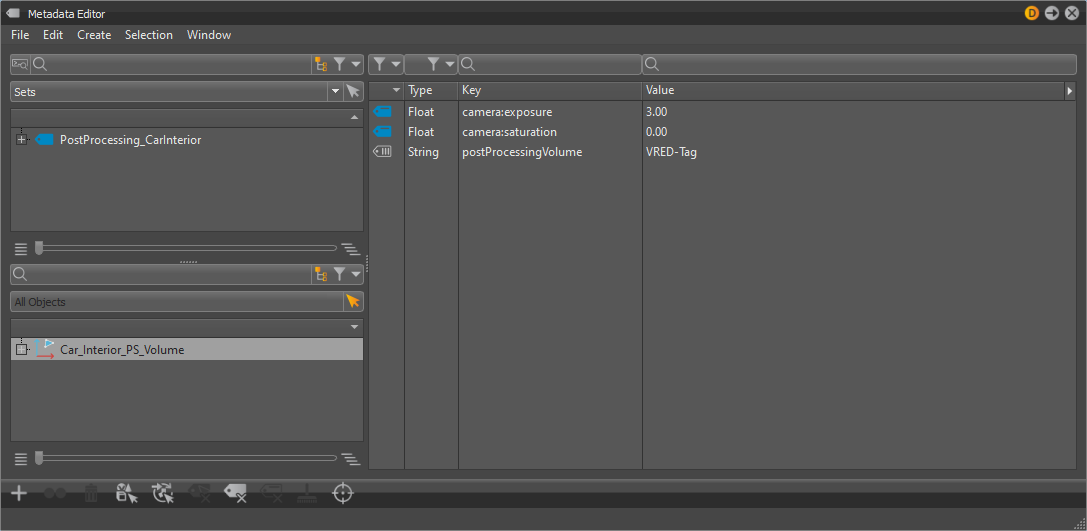
Python Scripting
When writing our script for post-processing volumes there are several aspects to consider. First, it's important to determine whether we're currently within a post-processing volume and if so, which volume we're in. Once we've identified the volume we can read its metadata and use it to apply specific effects to our camera. Before applying these effects it's a good idea to create a copy of the original camera settings. This ensures that we can easily restore the original settings if necessary. We will address each of these problems individually until we arrive at a functional solution.
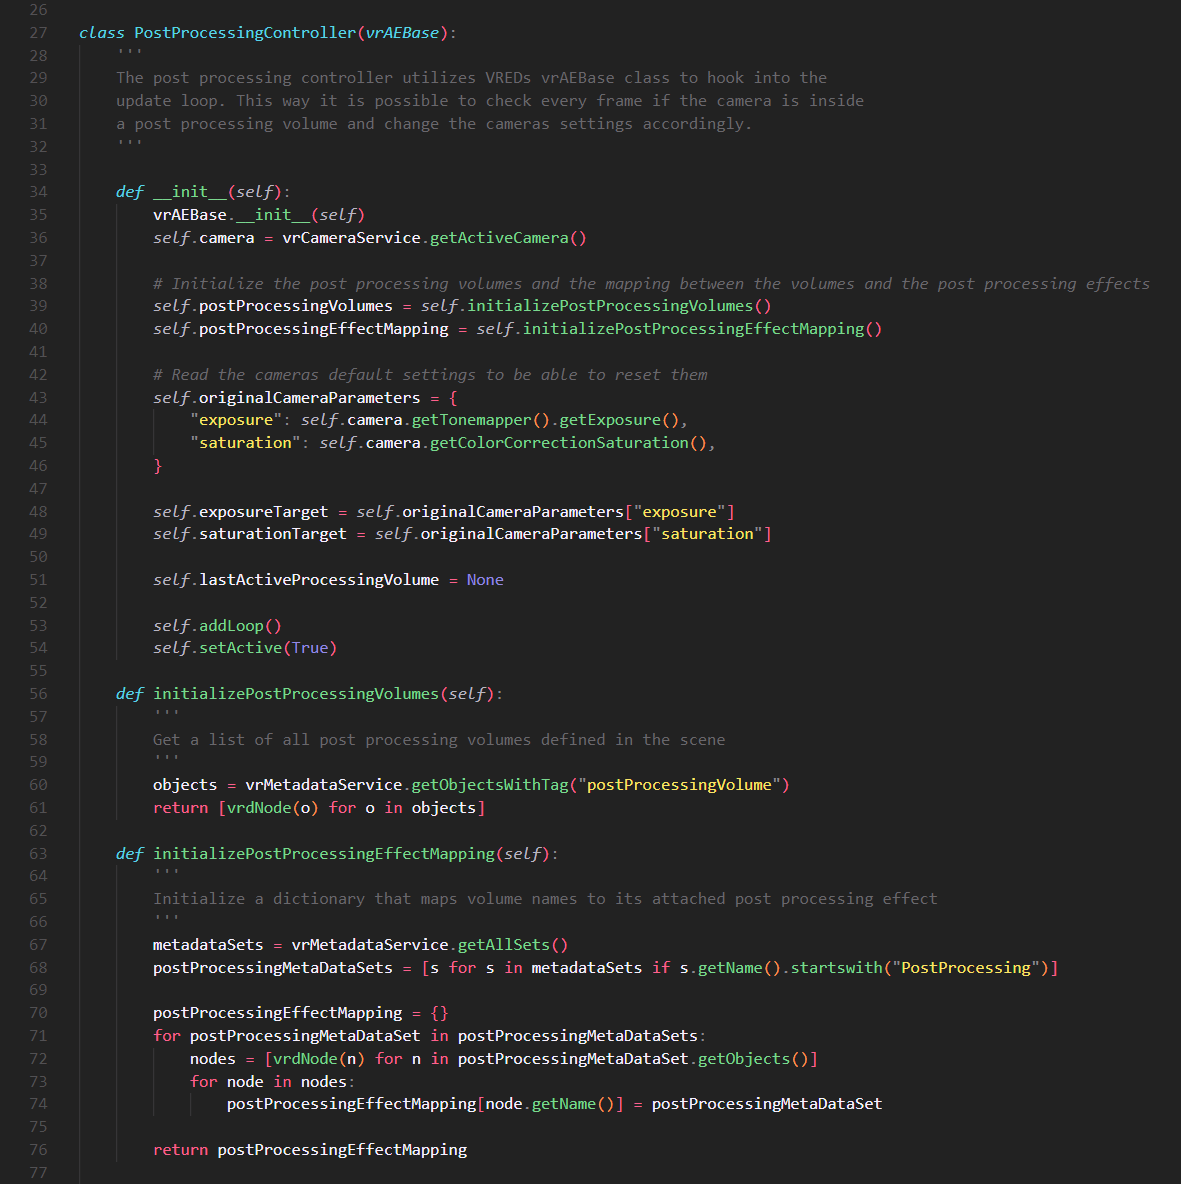
Post-processing Volume Detection
Autodesk VRED offers a class vrAEBase that can be used to run continous logic in the render loop. This way we can check for the cameras position in every frame and determine if the camera is inside of a post-processing volume. We can improve performance by querying all post-processing volumes at the beginning of the script and store its accompanying Metadata. Quering for this data every frame would be an expensive operation and would mean a detectable drop in performance.
We also create a dictionary that maps the name of the volume directly to its MetadataSet. Querying this information at runtime is rather cumbersome so this helps to keep our code clean.
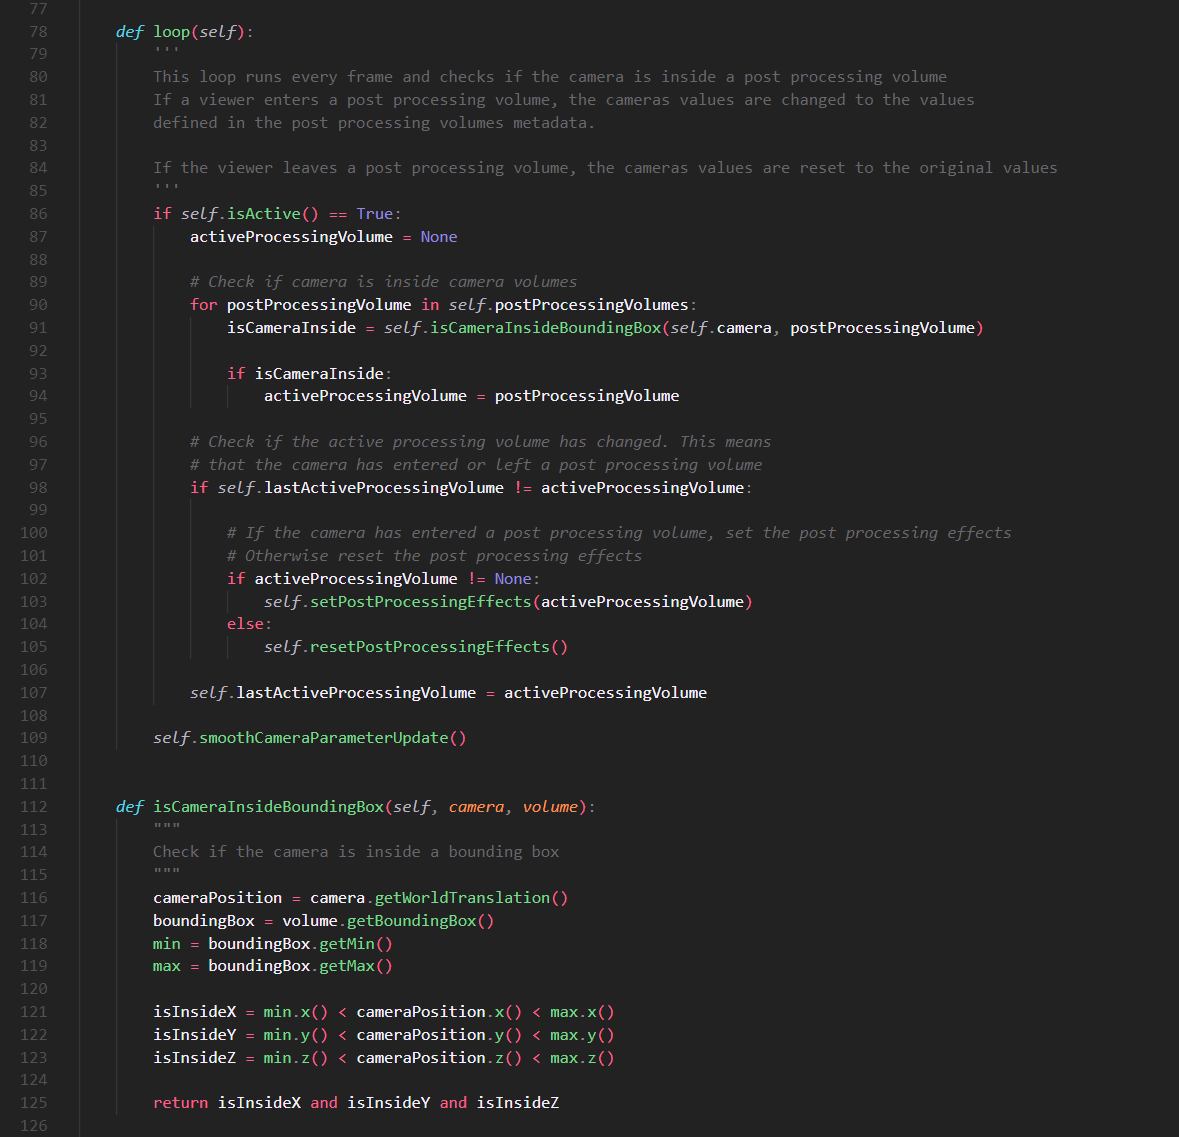
The logic to determine if the camera is inside a post-processing volume looks complicated but there are basically only two things happening here: First we check if the camera is inside of any post-processing volume. We can do this by checking the bounding box of the volume and compare it to the location of the camera. When the camera is inside any of the volumes we store it in a variable as "activeProcessingVolume".
Next we have to determine if the camera entered or left a volume. To do this we store the last active post-processing volume and compare it to the one we found earlier. If the currently active volume and last active volume are different, then the camera entered a new volume and we have to apply new camera settings. If the active volume is "None" then the camera left a volume and the camera settings have to be reset.
Apply Post-Processing Effects
When the camera is inside a post-processing volume we apply the effects that are stored in its Metadata to the camera. To achieve this we create a new method in our vrAEBase that will apply all post-processing effects. We can just search for certain names in the post-processing volumes Metadata and apply the value that is attached to it. We also add a flag to this class that tells us if we have a backup of the original camera parameters. We check this flag before we apply post-processing effects and store the original values of the camera parameters before we apply the effects to the camera.
When the camera leaves the post-processing volume again we have to detect this change and reset the camera parameters to its original state.

Resetting Camera Parameters
One problem that VRED poses when scripting for real-time interactions is that all changes to the scene are directly applied to the scene. In game engines like Unreal Engine or Unity a game has basically two states: Edit and Run. When running the game all scripts change the scenegraph and its entities but when the game is back in editing mode all changes are reset and back to its original state.
This might not be a big problem when the scene interaction is finshed and used in presentations, because these scenes are rarely saved. During development it can certainly happen that you save while still being in the post-processing volume and overwrite your original camera settings.
A solution to this problem would be to store the original camera settings directly in the Metadata of the camera settings and apply these original settings of the camera when it leaves the volume. But this also means an increased maintenance effort because when someone changes the parameters of the camera in the editor the changes also have to be applied in the Metadata. There are some clever ways to deal with this (and if you know some then we would be interested your solution!) but it gets complicated from there and would go beyond the scope of this article.
Further Improvements and Considerations
Right now we deal with exactly one post-processing volume. The script itself is designed to handle more but there are few problems that arise when using more than one volume:
How can you deal with nested post-processing volumes?
Can you smoothly interpolate between the states of multiple post-processing volumes?
Dealing with nested volumes poses the question of what volume should be prioritized when the camera is inside. Game engines often use weight parameter that tells the engine which parameters of which volume have more weight and interpolate between these values accordingly. Another solution would be to define a logic that tells us the script which volume has the highest influence on the camera. A simple solution would be to measure the distance of the camera to the center of the volume.
Smoothly transition between camera parameters is also possible by setting the new camera parameters as target values. This way we can apply an ease-function to approach the new parameters over time. There is an example in the github repository.
Summary and Outlook
In this post I showed you how you can implement post-processing volumes - a feature of current game engines - in Autodesk VRED. This implementation uses the new Metadata feature of VRED that was introduced with 2023.3 but could also be implemented using vrFieldAccess. Camera parameters that should be applied while in the volume are stored as key-value pairs in the Metadata of a bounding box. When the camera enters the volume the original camera parameters are saved and the effects are applied. When the camera leaves the volume again the original camera values are restored.
Of course this approach is not limited to camera parameters. Any parameter or action can be set in this way. This approach can be used to trigger animations when a camera is inside an area or to change geometry or material switches. The main advantage is that all functionality can be applied and managed with Metadata which can make your script more readable and maintainable.
A problem in VRED is that it does not differentiate between and “Edit-Mode” and a “Game-Mode” like game engines. This poses a problem when saving the scene as it would overwrite the original camera settings when the scene is saved. This can be a problem especially during development when the scene is changed and saved often.
Code
All code used in this article is available under a MIT license and can be used and altered as you wish. We cannot guarantee support for this script neither can we guarantee that this works in your environment. But if you have any further questions or insights don’t hesitate to contact us. We would love to discuss more ideas with you!
Github: Post-Processing Volumes with Metadata in Autodesk VRED
More topics
 Webcast: Realtime HMI-Design with VRED 2024
 Webcast: Was gibts neues in VRED 2024?
 Autodesk VRED: Real-Time Tutorials
 Autodesk VRED: Python Scripting Tutorials